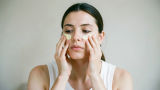
There is a funny moment when comparing portraits.
The face is almost unchanged, but the instant the top gets a little airy volume and the sides become more controlled, the whole person suddenly looks more polished.
That makes it tempting to add even more volume everywhere.
Do not.
Hair is not an “all toppings included” menu.
For a center-part hairstyle, the important question is not how much volume you create, but where you place it.
The practical target is simple:
- lift the crown;
- control the widest side area of the head;
- keep a little fullness around the temples;
- lift the roots before sweeping the fringe apart;
- do not saturate the roots with oil;
- do not put the camera right in front of the face.
1. Hair acts as a frame around the face
Hair is not visually processed as a completely separate object from the face.
Experimental work has shown that perceived attractiveness of the face and surrounding hair can influence one another [1]. A Korean study of male appearance also found that hairstyle significantly changed several impression dimensions, including evaluation, salience, potency, and dynamism [2]. That study used an older Korean student sample, so it should not be treated as a universal rule for modern dating. The useful point is narrower: hairstyle can alter the impression of the same person.
When the crown is lifted, the outline gains vertical space.
When the sides are also allowed to balloon outward, the silhouette becomes wide and boxy.
The goal is therefore not “more hair.” It is better shape.
2. Crown, widest side area, and temples have different jobs
The crown/top is where you want visible lift.
The widest side area sits roughly above the temples and ears. In Japanese salon language this area is often called the hachi. On thick hair, excess volume here can make the head look broad from the front.
The temples sit lower, around the outer eye-to-ear area. They do not necessarily need to be flattened as aggressively as the upper sides. Leaving a little hair here can create a smoother visual frame from the forehead into the cheeks.
The target silhouette is:
airy on top, controlled at the upper sides, slightly filled at the temples.
Not fluffy everywhere.
Not flat everywhere.
3. Build a center part with the dryer before reaching for wax
Step 1: Re-wet the roots if necessary
If the hair has bedhead, dampen the roots around the fringe, crown, and sides. Wetting only the surface often leaves the original root direction unchanged.
Step 2: Temporarily ignore the final part
Dry the fringe in alternating directions first. This prevents a hard, flat split from becoming fixed too early.
Step 3: Lift the crown
Raise the roots with your fingers and apply warm air. Let the section cool briefly after shaping.
That root lift creates most of the airy effect.
Step 4: Control the upper sides
Use your palm to guide the hair closer to the head and direct airflow slightly backward.
The crown goes up. The upper sides do not.
Step 5: Do not crush the temples
Leave a small amount of natural fullness so the face does not become visually narrow and elongated.
Step 6: Shape the fringe from the roots
Lift first, then sweep each side outward and slightly backward. The shape should come from root to mid-length to ends, not only from curling the tips.
4. Hair milk, oil, wax, and spray are different tools
Hair milk: conditioning and manageability
Hair milk is generally an emulsified conditioning product intended to add smoothness, softness, and manageability [3][4].
Use a small amount on damp mid-lengths and ends before drying.
It can help thick or dry hair behave better, but it does not change skull shape or permanently rewrite the direction of the follicles.
Hair oil: surface smoothness and shine
Hair oils are mainly used to improve surface smoothness, flexibility, shine, and cohesion [3][4].
They are useful on dry ends and flyaways.
Too much oil at the roots can collapse exactly the volume you worked to create.
Wax or balm: shape retention
Use these after blow-drying, mainly to preserve the shape.
Start with very little product, spread it thoroughly across the hands, apply to the back and ends first, and make the crown the final adjustment.
An “adzuki-bean-sized amount” is only a practical metaphor, not a scientific dose. Product strength, hair length, and density all matter. Start small and add more only when necessary.
Spray: optional insurance
Use light spray only if the crown collapses during the day.
It is not mandatory.
5. Does hair milk actually improve hair quality?
Not in the sense of permanently changing what grows from the scalp.
A 2025 review of human-hair friction explains that weathering and damage increase surface friction, while conditioning ingredients can deposit on the hair surface and temporarily reduce that friction substantially [5].
So the real benefit is improved manageability:
- easier combing;
- more aligned strands;
- less dry expansion;
- easier styling after drying.
If the side volume mainly comes from dryness and disorganized strands, conditioning can help.
If the main causes are density, head shape, or growth direction, haircutting and blow-drying matter more.
6. Dating-profile photos can fail because of camera distance, not just hair
A hairstyle can be excellent and the photo can still feel strangely intense if the phone is too close.
Research on facial photography has shown that camera-to-subject distance changes perspective and can affect judgments such as attractiveness and trustworthiness [6]. A 2024 study also measured visible midface distortion in smartphone photos taken at very short, selfie-like distances of roughly 8 to 12 inches [7].
The practical move is simple:
step back, then crop later if necessary.
A little distance also allows the viewer to see the hair silhouette rather than only a giant face filling the frame.
Moving closer does not necessarily add useful information.
Sometimes it mainly gives the nose a promotion.
7. Four common failures
Everything is voluminous: the head becomes wide and tall. Control the upper sides.
Everything is flat: the center part loses dimension. Lift only the crown roots.
Oil is applied generously at the roots: the airy shape collapses. Keep oil mostly on lengths and ends.
Wax is expected to build the whole hairstyle: the result becomes heavy. Build with heat and airflow; use product to hold.
8. The final formula
Lift the crown.
Control the upper sides.
Keep a little temple fullness.
Condition for manageability.
Use styling product only to preserve the structure.
Move the camera back.
A good center part is not a contest to create the maximum amount of hair.
It is a placement problem.
Sources
- T. Nakashima et al. “Visual attractiveness is leaky: the asymmetrical relationship between face and hair.” PubMed PMID 25914656 pubmed.ncbi.nlm.nih.gov
- Jiwon Ryu, Jae-Sook Kim. “The Effect of Male Make-up and Hair Style on the Impression Perception.” Journal of The Korean Society of Cosmetology, 2007;13(3):1345-1355. KCI. The study included 940 male and female undergraduate participants aged 18–51 and found significant hairstyle effects on several impression dimensions kci.go.kr
- Milbon, “ヘアオイルとヘアミルクの違いは?正しい使い方をミルボン社員が解説,” 2025-02-13 fyb.milbon.co.jp
- Kao Hair Care, “スタイリング剤|髪と頭皮のお手入れ. kao.com
- Erik Weiand et al. “Understanding and controlling the friction of human hair.” Advances in Colloid and Interface Science. 2025;345:103580 pubmed.ncbi.nlm.nih.gov
- Bryan et al. “Perspective distortion from interpersonal distance is an implicit visual cue for social judgments of faces.” PLoS ONE, 2012. PubMed PMID 23028918 pubmed.ncbi.nlm.nih.gov
- Quantifying Facial Distortion in Modern Digital Photography.” Laryngoscope, 2024. PubMed PMID 37543968. The study measured distortion across camera types and distances, including smartphone photos at short selfie-like distances pubmed.ncbi.nlm.nih.gov